(BAR-44) Gee Bee Pod Racer
I saw the rendering below on the Facebook Dieselpunk Gallery.
It's kind of a bash of Star Wars pod racers, and what I believe to be a 1930's Gee Bee Model R Super Sportster air racer. Gee Bee's were purpose built, just for racing. A way cool airplane that doesn't look like it should even fly.. but fly they did. In 1932 it not only won the Thompson Trophy Race, but actually lapped all the other competitors, except one.
Here's the final design I'll enter into CAD.
- Standard Front Eject
- Flies on a single 29mm Motor
- Using a piece of 3" Steel Pipe as Ballast, buried inside the nose.
- 30" Dia Nylon Chute
- Onboard Altimeter Stowage
- 4" Dia. Nom. Body


2025-03-21
I was able to finish the CAD Model and create an outline drawing of the BT-400 version. Pretty pleased with the results.


2025-03-21 Drawing Set, Sheets 1 through 10, Rev 00


2025-03-23
Somewhere in this mass of wood hides the Engine Cowling / Nose Cone of a Gee Bee Pod Racer.
A 6" piece of 4x4 and (4) 1x4's.... all glued together to be turned on my wood lathe.
A 6" piece of 4x4 and (4) 1x4's.... all glued together to be turned on my wood lathe.


2025-03-24 Prepped the wooden block for turning using my table saw.

2025-03-25 Nose Cone ended up turning out quite nice.


2025-03-27 Cutting, Routing, Gluing and Sanding the Fins


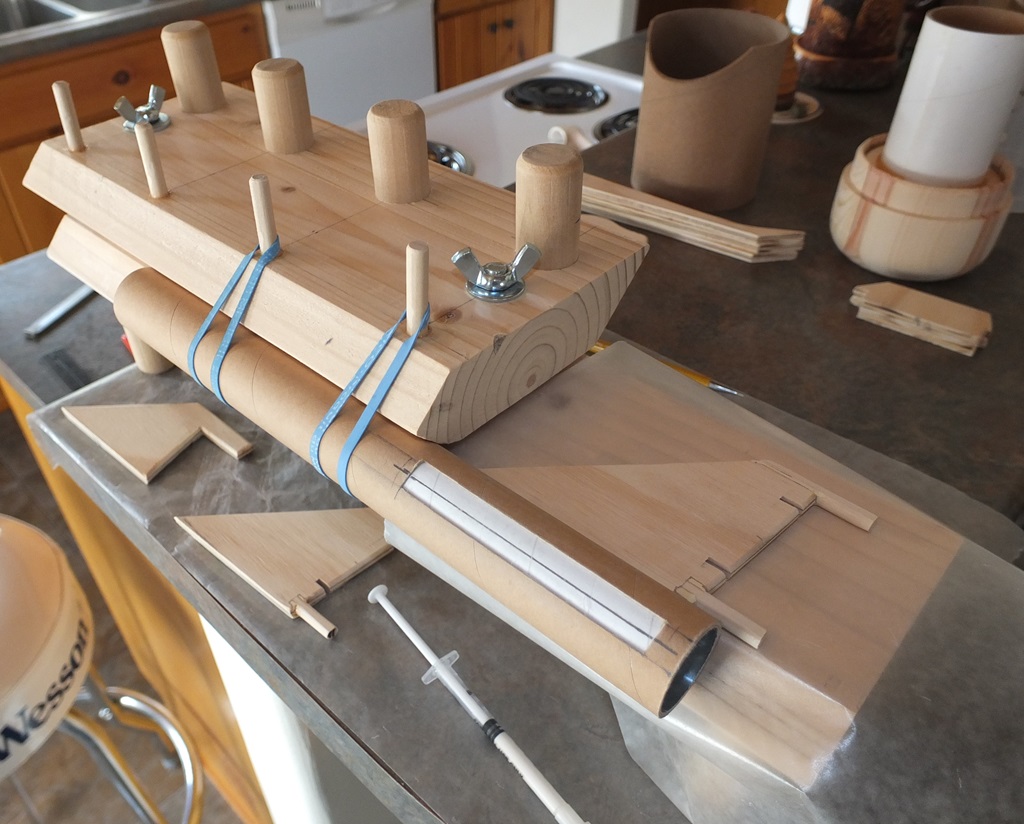
2025-03-28 Centering Rings and Body Tubes
I made the Centering Rings from 1/4"
plywood using a Fly Cutter, a Forstner Bit and my Wood Lathe. Then
started wood gluing the Front Centering Ring to the Nose Cone, and the
BT/C-80H to the Nose Cone / Front Centering Ring.
Also located my stash of now vintage B-B's, which I'll be using for Ballast instead of the 3" Sch 40 Pipe.


2025-03-29 Nose Cone Ballast
I used 16 Ounces of "Copper Head" (good name for a rocket)
B-B's. Placed a 3rd of them, drizzled some wood glue on them, and
repeated that 2 more times. I then placed a centering ring over the
B-B's and glued it into place.
Weight of the copper plated steel B-B's is approximately 2.24 Ounces per Cu-In.


2025-03-30
Rear Fins CWF, Slotting the C-55 and beginning to installing Fins


2025-04-01 Intermediate Fin Initial Gluing and Slotting the BT-400
The Intermediate Fins glue to the surface of the C-55 and to the Rear Fins.
Slotted the BT-400 for the Pods.


Glued the Nose Cone to the BT-400 and applying glue fillets to the Intermediate Fins. Also added some cheaters to the TTW portion of the pod fins.


2024-04-02 Gluing the TTW Pod Fins to the BT-400


I dry fitted the internal Centering Ring
to the BT-80H and it's a tight fit. So I decided to leave it there
temporarily and glue the Pod Fins to the BT-400. That should help to
keep the BT-400 in place once the glue dries. I can then glue the pods
to the BT-80H.
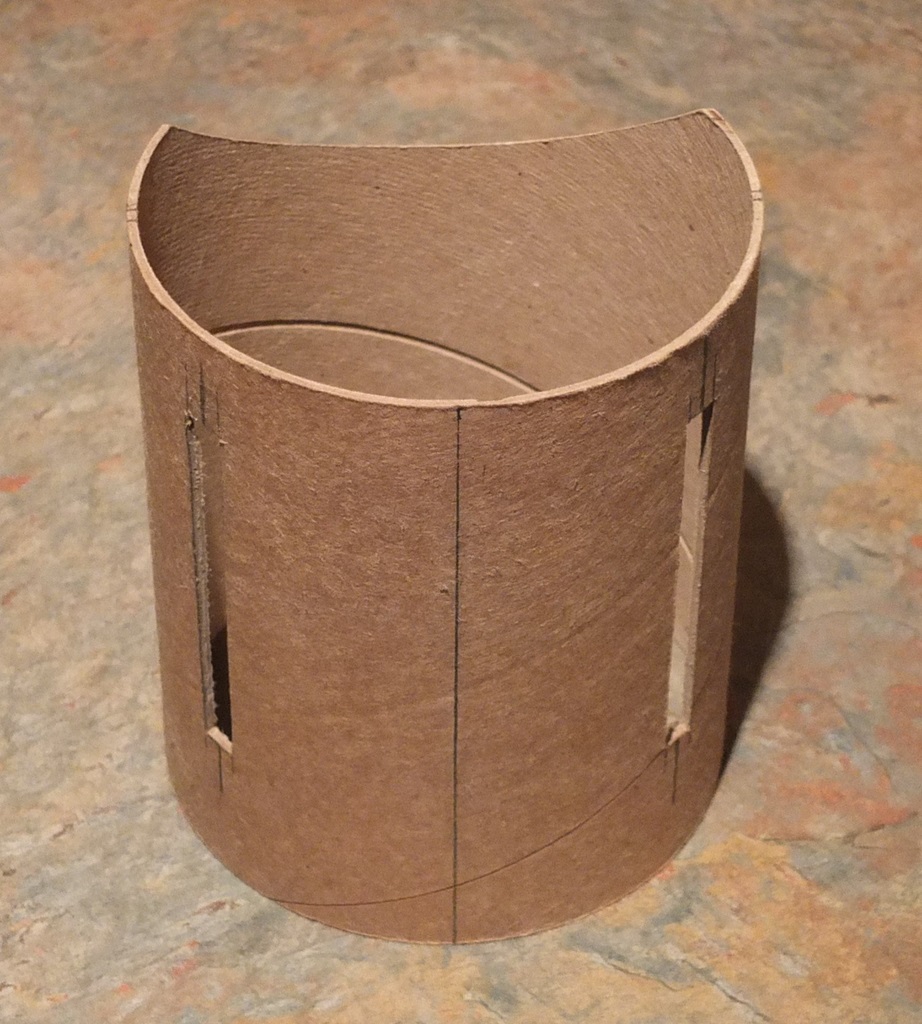
The
rectangular box in the 3rd photo was made from some scrap BT/C-60 from
the fin tubes on my Fleet Interceptor. It will glue inside the BT-400
and act as a stowage compartment for my Altimeter Two.


Glue Fillets: BT-400 to Pod Fins
Gluing the TTW Pod Fins to the BT-80H
Laying down a couple wood glue fillets, then placing the Centering Ring back on.


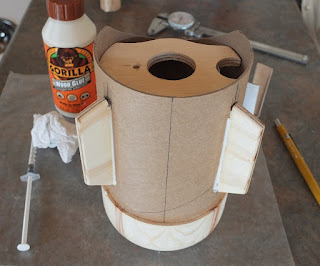
2025-04-03 Gluing Internals


Finished up gluing the internals of the TTW Fins and then glued the Altimeter Stowage box inside the BT-400. That's it for the internals, so the Rear Centering Ring had wood glue inserted into the tenon for the BT/C-80H and also on the TTW fin ends. The Centering Ring was then put into place and the assembly was set upright for drying.


2025-04-04
Gluing the : Centering Ring to BT-400, Dash to Centering Ring, and Rear Fuselage to Centering Ring


- Used Gorilla Wood Glue to attach the Centering Ring O.D. to the BT-400.
- The Dash was cut from 1/8" Basswood, Sanded the Centering Ring boss to match the angle of the BT-400 and then glued the dash in place.
- A generous amount of wood glue was applied to the Centering Ring center hole, as well as to the Rear Fuselage Center Tube and the ends of the Intermediate Fins. The Rear Fuselage was then set into place on the Centering Ring and shimmed for plumb.


Photo Shoot


2025-04-05 Installing the Side Pod Body Tubes.
These were originally designed to be
motor tubes, so they needed to be able to handle the thrust. That's the
reason for the TTW Fins and the Body Tube slicing and dicing.
Since
they also need to support the weight of the finished rocket, which at
over 2-1/4 lbs is pretty substantial. I figured I'd go ahead and leave
the design Hell-For-Stout.
I used @AeroTech 's fin mounting arrangement... but in reverse.


2025-04-06
Internal Gluing of the Centering Ring and Installation of the Fin Cheater Dowels


2025-04-08 Intake Cone and Motor Pod Nose Cones
Turned the Intake Cone and the (2) Motor Pod Nose Cones on my wood lathe.


2026-07-17 Ejection Gas Scrubber Retainer and Primer
Added a 1/4" dia. dowel as a Ejection Gas
Scrubber Retainer. This rocket will use some Scotch-Brite® Stainless
Steel Scrubbing Pad and this should keep that in place.
Masked the back section and then primered the "Gee Bee" nose section.


Sanded the "Fuzzies" off the C-400 tube.... much better.

2026-07-18 CWF and Primer Second Coat


2026-07-19 Rustoleum Satin White

2026-07-24 Rustoleum Sunrise Red
Needs some touch up, but overall I'm
pretty pleased with how the red turned out, and the lack of paint
over-spray on the wooden components.


No comments:
Post a Comment