Launch Report: The USS Edsel Ford
Background
The rocket has an Altimeter Storage Bay.
This flight included an Altimeter Two.
This is a rear eject rocket that utilizes a spool.
On Site Preparations
An igniter was installed in the motor and secured via a rubber band.
The rocket was slid onto the 5/16" launch rod and the controller wires were attached to the igniter leads.
The site was clear and no outside observers were present.
Launch
The Aerotech G74-4 motor ignited and the rocket leaped off the pad.
It flew stable upward to apogee (512 ft), the parachute deployed and the rocket slowly came back to Earth.
During the coast phase the rocket was very quiet, no sound at all.
The rocket landed 230 feet from the launch pad, to the North-East.
Altimeter Data
Average Accel: 5.8 Sec. Coast to Apogee: 4.5 Sec. Apogee to Ejection: 0 Sec.
Ejection Altitude: 512 Feet Decent Rate: 12 mph Flight Duration: 33.5 Sec.
Flight Profile
Condition of rocket after the flight
Conclusions
The delay was spot on.
What I learned
The photos and launch video reflected this flight accurately.
The view of the rocket from the ground was amazing.
Flight Video: The USS Edsel Ford


04-04-2024
Applied some Rustoleum Clear and the Sharpie colors didn't run... yipee.


04-03-2024 Radiator


04-02-2024 Distressed Paint
I sanded the white paint to give the rocket a worn and torn look. I then used a Sharpie to add the blue, sanded the blue, and then used Acetone to smooth out the blue. Also used a black Sharpie on the windows and air inlets.


03-31-2024 White Paint

03-30-2024 Primer Day 02


03-24-2024 Primer Day 01
The weather is once again wreaking havoc here.
I wanted to get the 1st coat of primer on the rocket to see how the panelizing looks. Thermometer read 44 F. I ran some hot water into a mug and tossed the can of primer into it, and headed out back to set-up the Workmate. Hurried back inside, grabbed the rocket, the primer, the camera and a paint mask and headed out. Just as I finished the first coat and was take some photo's the flurries started. So I picked up the Workmate & rocket and carried the to the covered breezeway.No drips, no runs, no errors.
The temp's are now dropping like a rock.... 38 F.


Fast forward 20 hours

03-23-2024 Panelizing, Day 03 and, err, Launch Lugs
I was installing the last few panels today and thought "Launch Lug, hey, where's the launch lug?"
Well, I installed a couple 3/8" lugs on the lower body , on either side of the nose to clear the chin spoiler.


03-17-2024 Panelizing, Day 02
Added windows to the cockpit and some structural "stuff" down the backbone.


03-16-2024 Panelizing, Day 01


02-03-2024
Air Inlet Redux
Yeah... didn't like those wimpy air inlets... so I replaced them with a glued up composite of (5) pieces of 1/16" thick balsa. Then sanded them into submission.


02-02-2024
It's been cold, which limits barn time, so slow progress. It's good weather though to update the CAD files. See the 01-16-2024 journal entry below.
Made a couple of snorkel style air inlets, and the fairings for the lower stabilizers. Used home made balsa plywood since these parts are non-structural and not in harms way. I'll use some CA to harden these pieces.


01-28-2024
Swing Test Video and Progress Shots
Swing Test - USS Edsel Ford - A Sci-Fi Flying Model Rocket (youtube.com)


Gluing the top and side plates.


01-27-2024
Gluing the nose cone to the BT/C-300. My "Circle of Friends" help hold the rocket in position.


Titebond Quick and Thick fillets on the nose cone.

01-26-2024
Upper Radiators


And Glue Fillets


01-25-2024
Started installation of the lower radiators. These are tricky: I drew lines on the nose cone spaced 22-1/2 degrees, then used some masking tape.

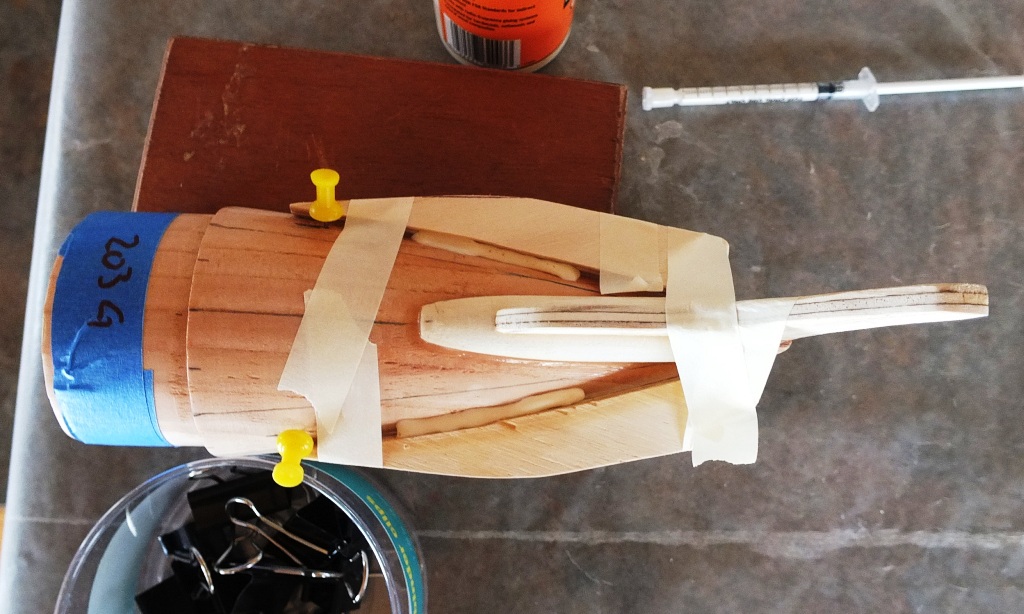

01-24-2024
Sanded the cockpit outside and then started gluing it and the chin spoiler to the nose cone.


01-23-2024
Cut the nose cone accessory parts from 1/4" plywood. Also rough cut the cockpit from (2) pieces and glued them together and will finish cut them after the glued has dried.


01-21-2024
Gluing 1/16" Basswood to the fincan sides, and installed the 1/4" dowels for the fuselage 1/16" Basswood.


01-20-2024
Mockup


Nose Cone Turning / Fabrication


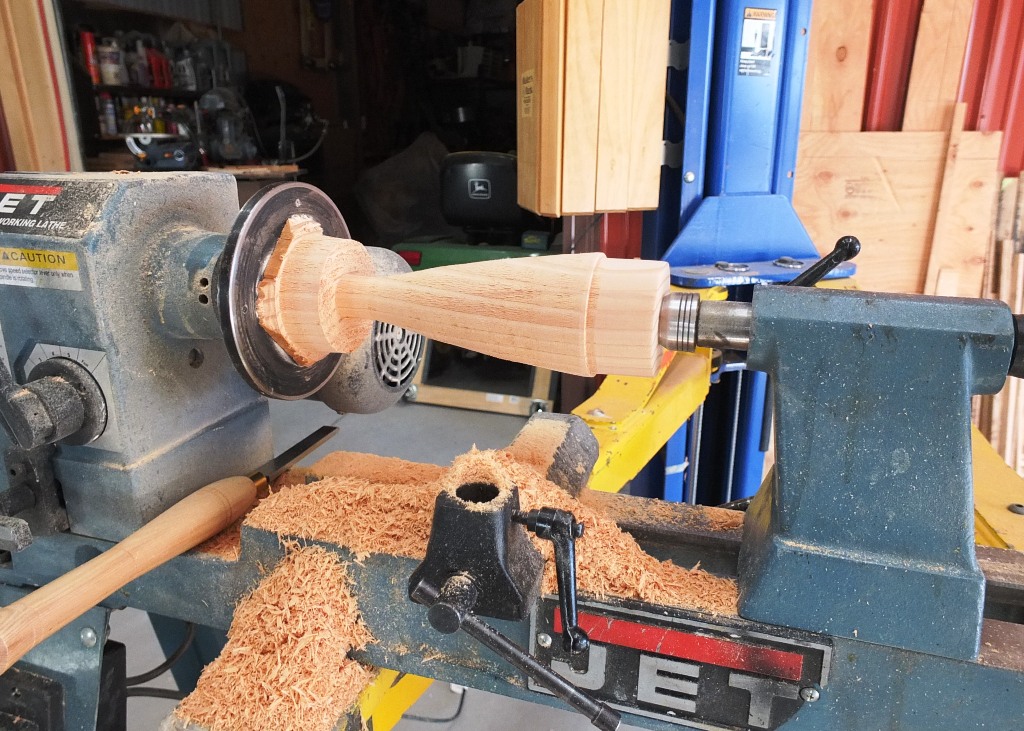


01-19-2024
Stabilizer, continued
The alignment fixture worked like a charm.


Stabilizer Build Day 2
Sanded the stabilizers and added glue fillets before attaching them to the BT/C-300 tubing. Also took the time to make a cardboard fin alignment fixture.


01-18-2024
Stabilizer Build Day 1
These are made from 1/8" Basswood, and 3/16" poplar dowels.


01-16-2024
I made an update to the CAD Model and flipped the upper vertical stabilizers. This makes the model look much more like the sketch by Galan Pang.


01-09-2024
Here's a truly awesome design by Galan Pang.


I created an OpenRocket design, starting with a BT-300 tube. This will use a 29mm composite motor and be a rear eject design.


Next up is to create a CAD Model and Dwg Set.