(BAR-37) The Atomic Cap Rocket
A rocket that pays homage to the die cast metal "Cap Rockets" that kids have played with since, well... forever.
BT-50H based, 24mm power


2024-09-15
Well there's no way to make the short rocket stable except for stretching the body tube and adding nose weight.
It's a BT-50H with standard front eject. The launch lug is kind of cool IMO.

2024-09-16
Did an upscale from BT-50H to BT-60... I just like building these BT-60 / BT-80 birds.. what can I say? 29mm rear eject utilizing an ejector tube.


2024-09-19
Updated the simulation to final configuration.

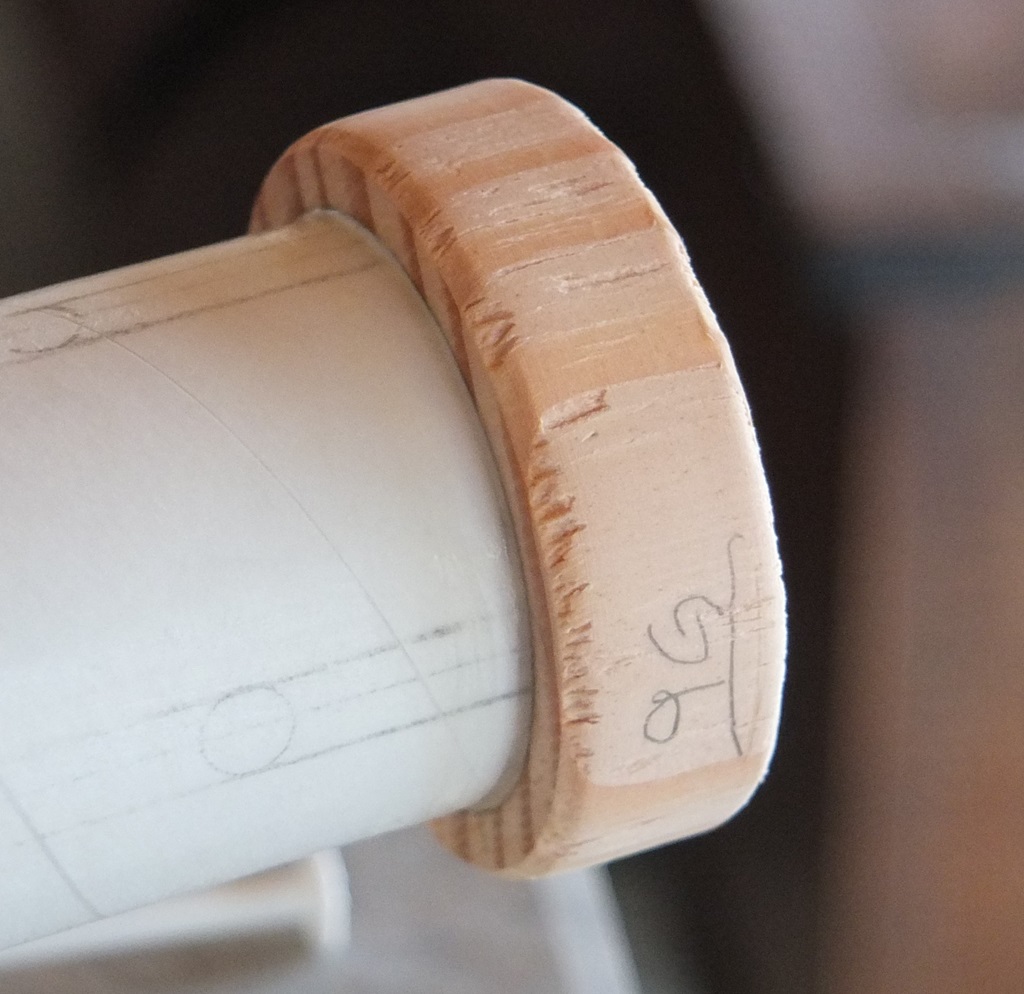
Nose Cone
Well... I had to buy a 4x4 for this project... I used up all my scrap I had in the wood shed. I bought a 4 in x 4 in x 8 ft piece of Douglas Fir and the local yard let me pick the best one out. This one has no knots, is not from the center of the tree, and it's b-e-a-utiful. Sure... it cost $36

So I cut off an 8 inch long piece ($2.40) chucked it in the Jet wood lathe and made the Nose Cone and the Ring at the base of the Nose Cone.


Cut the fin templates from paper,
transferred it to cardboard, then to some 1/4" plywood which was cut
using a scroll saw and then sanded to shape.
I
also prepped the tubes for the fins. The Lower Fins will glue to the
internal C-60, the Upper Fins and Launch Lug Mount to the surface of the
BT-60.
Using
the OpenRocket fin guide the Body was layed out for the fins. Using a
circle template, 5/16" dia. circle were drawn on each of the Lower Fin
locations, and a 1/4" dia. circle for the Upper Fins. Lines were then
drawn for the fins from the outer extremities of the circles. It's just
an easy way to lay out the tube.
I used my 3/4" aluminum angle as a straight edge and then cut the slots into the tube.
Elmer's School glue was used to attach the inner C-60 to the Outer BT-60.


This is the 1st rocket where I am using my fin attachment fixture to locate and attach the fins.
One
thing is that while it does a great job of aligning the fin
perpendicular to the rockets vertical centerline, it does nothing to
orient each fin to each other.
But...
- On a (4) fin rocket, if the spreader fixture is used in conjunction with the alignment fixture, those two fins would indeed be 180 degrees apart.
- And if another fixture that I can use that spaces the fin 90 degrees from each other, that should also work.


All that being said, the fixture is pretty great. I installed all the fins in about a 3 hour time frame.


2024-09-20 Nose Cone Ballast and Recovery Dowel
Ballast:
A
4" long piece of 1" steel bar stock was placed in the chuck of the wood
lathe, then an angle grinder with a 1/16" thick cut off wheel was used
to slice off a 1-1/2" long piece. A groove was cut in the o.d., also
with the angle grinder.
Final weight is 156 grams
Recovery Dowel:
This was cut via a hack saw from a piece of 3/8" steel bar, it's about 1-1/2" long also.
Final weight is 18 grams
Gorilla
Wood Glue was placed into the Ballast o.d. groove and it was then slid
down into the counter bore of the Nose Cone. Then a fillet of wood glue
was placed around the o.d. with a syringe.
The Recovery Dowel is a tight press fit into the 3/8" cross bored hole in the Nose Cone Hub.


Gluing the Nose Cone and Upper Fins
The Upper Ring was Gorilla Wood Glued to the Body Tube o.d..
A piece of 300# Kevlar Shock Chord was attached to the Recovery Dowel.
Two holes were punch through the Body Tube just below the upper ring.
Wood Glue was applied to the face of the Upper Ring and the Nose Cone was set into place and allowed to dry for 1/2 hour.
Wood
Glue was injected into the two punched holes until the glue started to
build up on the face of the Nose Cone Hub inside the rocket.
The rocket was held upside down and spun for 45 minutes at 45 degree angle.
The O.D. of the Upper Ring was wood glued to the Nose Cone.
The Upper Fins and Launch Lug Support were glued to the Body Tube and to the Nose Cone.


2024-09-22 Glue Fillets


2024-10-06 Spool Build, Day 01
Cut some Centering Rings and Body Tubes for the Spool.
I
had planned to use some BT-20 for the Ejector Tube... but I dug through
my body tubes and none was on hand. So I used some Starbucks Tubes I
had saved. Kind of a tube-in-a-tube set-up. The blue and pink striped
tubes are 0.51 o.d., and the white tubes are 0.41 i.d.. I used wood glue
to glue them together, and used a wood glue wash to fire-proof the
inside of the tube sub-assy.
The motor tube is BT52H and is foil lined. The foil was sanded off the area where the ejector tube glues into the tube.
I
glued one of the large Centering Rings to the BT52H, and let it dry a
few hours, and then took it out and turned the Centering Ring for a slip
fit into the rockets C-60 Inner Tube.
The two smaller Centering Rings were glued to the 0.51 o.d. tube and this sub-assy will glue into the BT52H.
Clear as mud? The assembled spool model is shown below the photos...
Note:
The
rubber ejection plug that is supplied in the composite motor needs to
be removed prior to flight. If it isn't removed... the plug has a high
likelihood of getting stuck in the spools ejector tube... and an "anomaly" would occur  😟
😟
😟


Swing tested the Atomic Cap Rocket today. 
It passed with flying colors. I'm thinking it's over stable.. I moved the string back away from the nose to really test this one... and it still flew stable.
It passed with flying colors. I'm thinking it's over stable.. I moved the string back away from the nose to really test this one... and it still flew stable.


Primer: Rustoleum Rusty Brown (Red Oxide),
Paint: Rustoleum Metallic Silver

No comments:
Post a Comment