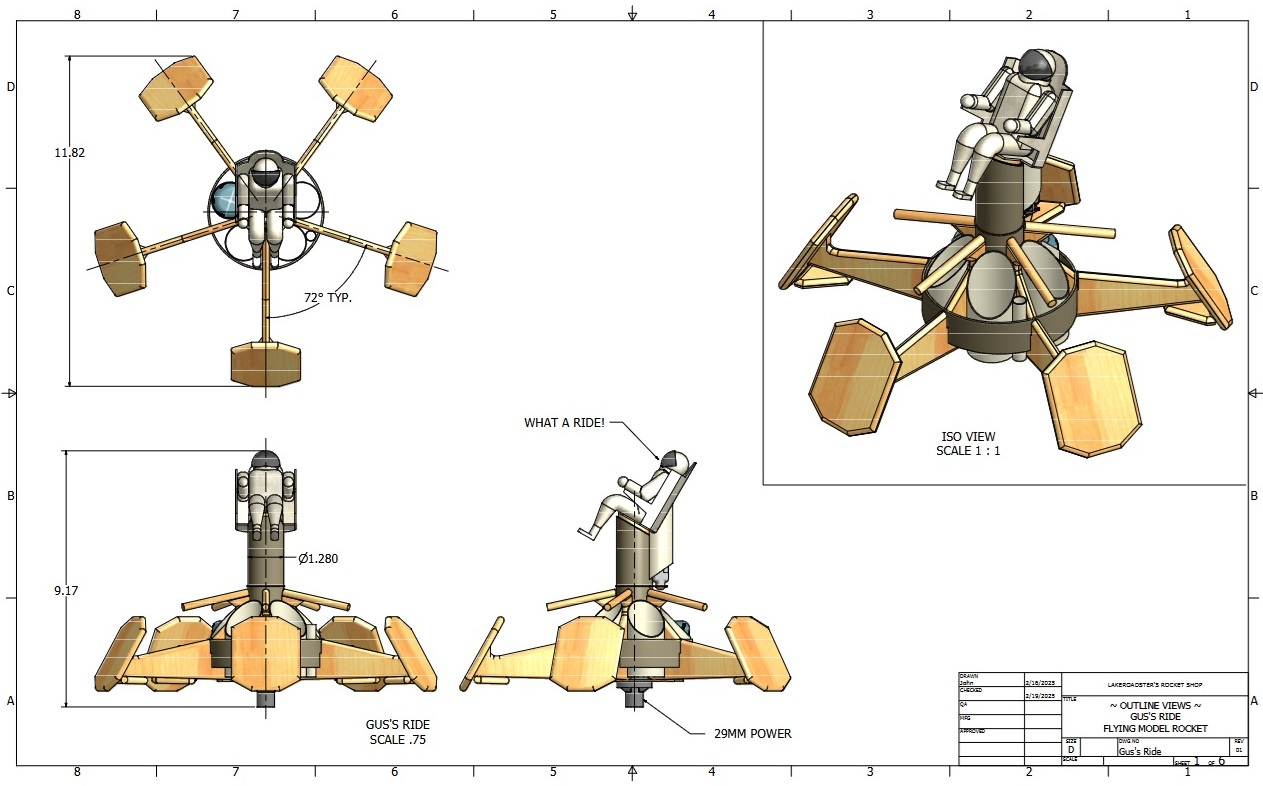
(BAR-43) Gus Grissom's Ride... A Mid Powered Take
on the old Centuri Satellite Killer
Here's a home brewed version of Centuri's Satellite Killer, equipped with a seat for for Gus Grissom.
When I built my Mercury Escape Tower Rocket, way back in 2021, it came with a really nice flexible plastic Astronaut... who I've always referred to as "Gus". That design used a gutted capsule, so Gus has been sitting at my CAD station all this time.. I decided to build him a ride.
This Satellite Killer is built hell for stout, 1/4" plywood fins and brakes, and there's lots of glue fillets attaching it all together.
Motor Mount is 29mm, and it recovers on an 18" nylon parachute.
This is a spool design, gotta take a leap of faith in regard to stability on this one. I did an Open Rocket simulation, just for ***** and giggles.
It'll be a fun build.


2025-02-18 Noodling over the OpenRocket simulation...
- replaced the 24" dia. parachute with (2) 15" parachutes so they fit inside the BT-55 tubes,
- added a BT-50 tube to hold my Altimeter Two. That should make post flight review much more informative.

2025-02-19 Drawing Set, Rev 01


2025-02-20
Let the build begin!
Cut the tubes and the plywood parts.
Also glued the C-55 tube to the BT-52HMF using Elmer's Glue-All. I sanded the glassine off the BT-52HMF using my wood lathe.
Started gluing the Fins to the C-55....


2025-02-21 Finished the Gorilla Wood Glue fillets on the Fins and the 4" Ring Fin

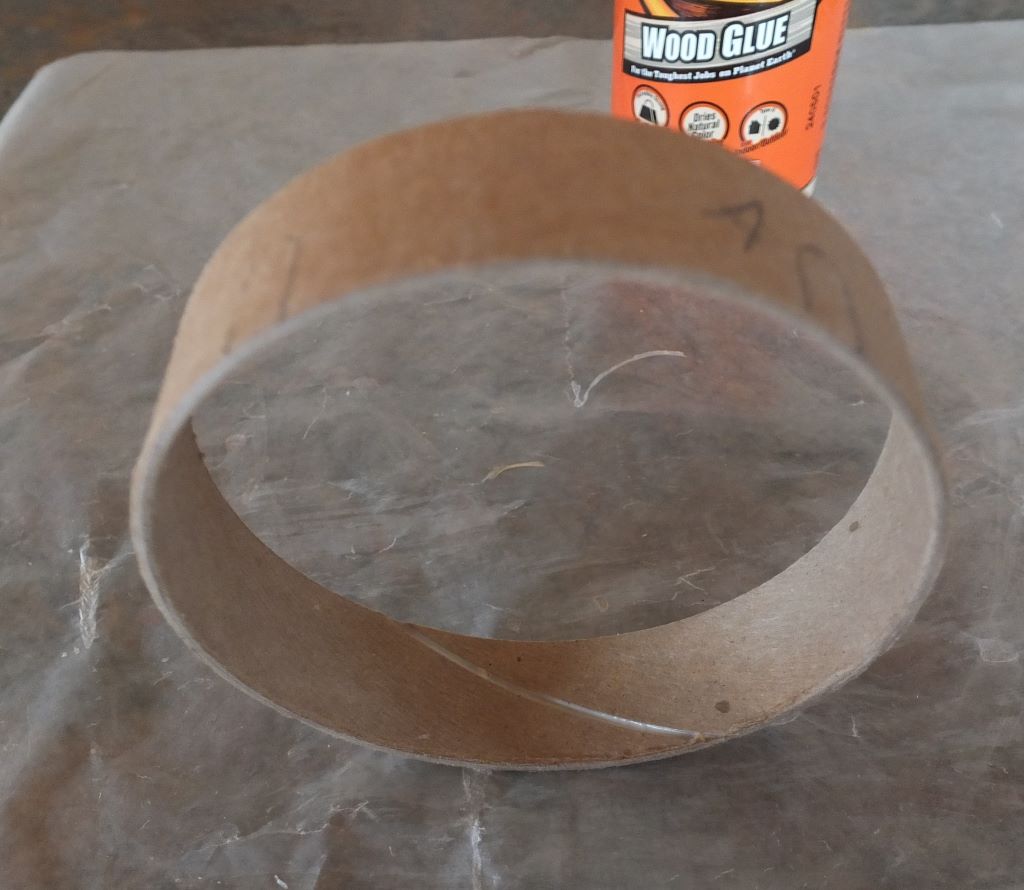


Titebond Quick & Thick Fin Fillets and Ring Fin Gorilla Wood Glue Fillets


Preview....

2025-02-22
Turned a pine Upper Bulkhead on my wood lathe, think nose cone shoulder,
and prepped the BT-52HMF by removing some of the metal foil lining.
The Bulkhead to BT-52H joint needs good adhesion for the wood glue as it
sees the full brunt of the motors ejection charge. I may even install
some small wood screws.
I need to buy a lag screw eye... so I'll glue in the Bulkhead at a later date.
I need to buy a lag screw eye... so I'll glue in the Bulkhead at a later date.


Installing Tube Fins and Launch Lug


2025-02-23 Forward Bulkhead Machining and Installation


2025-02-24 Swing Test

Air Brakes... Engage! 

2025-02-26 Swing Test #2 (With Air Brakes)

Lots of sanding of Glassine off the tubes followed by small glue fillets.


2025-02-23 Forward Bulkhead Machining and Installation
Picked up a Stainless Machine Screw Eye @
the local Tractor Supply and then counter-bored and drilled the Forward
Bulkhead using my wood lathe.
Assembled the Screw Eye into the Bulkhead using Flat Washers on both ends, then glued the Assembly to the BT-52HMF.


2025-02-24 Swing Test
Just for Shits and Giggles I did a swing
test of this before installing the Air Brake Pads. It's stable, and the
Open Rocket Simulation also shows it's stable when I remove the Air
Brake Pads.
I'll add the Air Brake Pads... and swing test it again


2025-02-26 Swing Test #2 (With Air Brakes)
Uncharted territories... I just love
treading here. I performed the 2nd Swing Test, this time with the (5)
Air Brakes attached to the end of the Fins.
Pretty amazing how much it adds to the stability, how much harder it is to swing it through the air, and how noisy it is.
Looks like we're a go to complete the gluing of the Air Brakes, and to finish building the rest of the rocket.
Air Brake Pad glue fillets.
This rocket won't fit in my "circle of friends" for glue fillet positioning... so I had to get creative with my Quick Clamp.


2025-02-27
Built a restraint for Gus, and the rear chute retainer. Then started to glue the Dowels into position.


2025-02-28 Seat Back Brace / Altimeter Mount 

I've made the Back Brace / Altimeter Mount and glued it to the body tube... and will follow up with glue fillets.
Could someone recommend an adhesive for bonding cardboard to styrene? I'm thinking of using some Testors Model Glue.. you know in the red tube? I'm thinking a liberal amount on the inside and outside of the tube should be sufficient.
Could someone recommend an adhesive for bonding cardboard to styrene? I'm thinking of using some Testors Model Glue.. you know in the red tube? I'm thinking a liberal amount on the inside and outside of the tube should be sufficient.


2025-03-01 Attaching The Seat
I'll 1st use J-B Weld Epoxy on the Seat (Styrene) to Nose Cone
(Pine) joint, then after that's dry I'll use Testors Plastic Model
Cement on the Seat Back (Styrene) to Back Support (BT/C-50).
First
order of business was to mark the Seat contact areas and scuff up the
Styrene. That means a portion of the back, and the entire bottom of the
base.
I happened to have just enough J-B Weld left over from my Mercury Capsule build. I laid everything out, then mixed the batch of epoxy and applied it.
I used rubbed bands to hold the seat in place while the epoxy cures. Now... we'll wait 6 hours...


Testors Plastic Model Cement on the Seat Back to Back Support
Worked pretty good! Also drizzled some on the inside of the Back Support tube at the Seat Back.


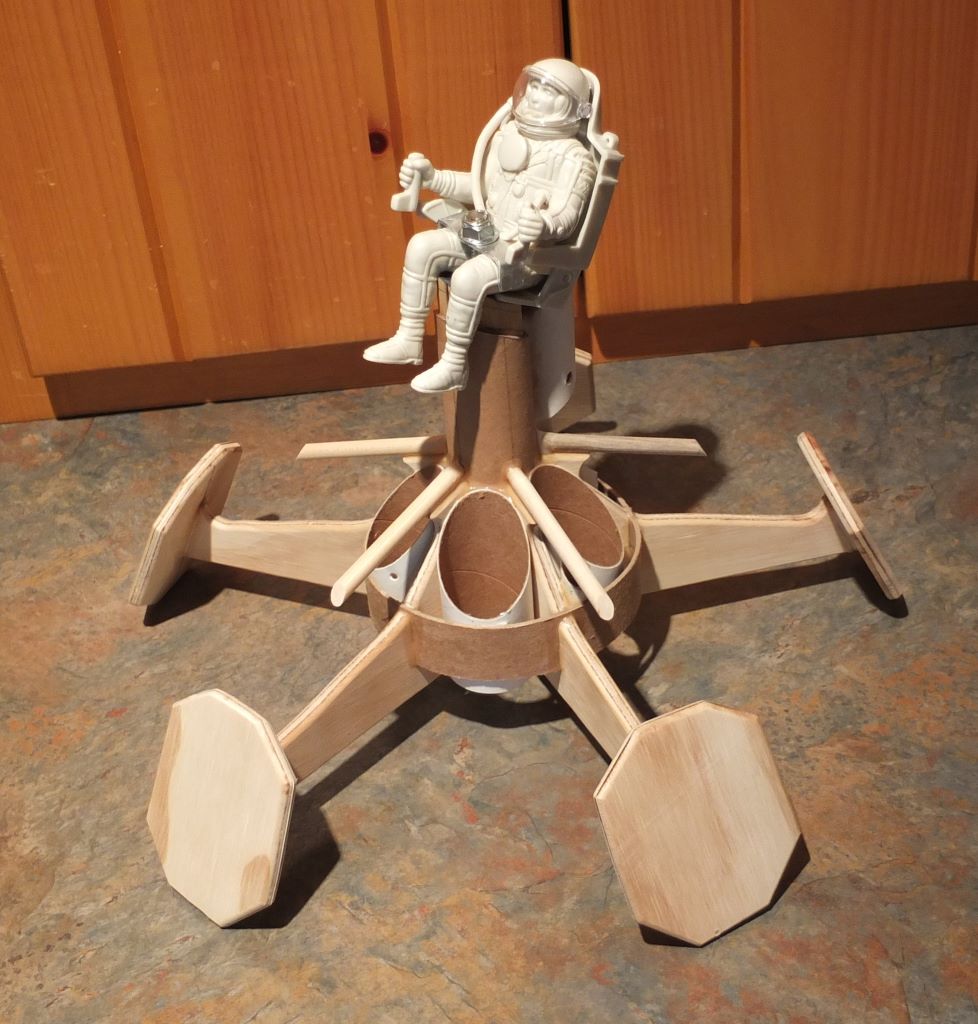
2025-03-02 Astronaut Piping and TBII Q&T Fillets
I pulled out my left over Mercury pieces
parts and salvaged some more seat parts and some hoses for Gus, just in
case their needed. Don't need a loopy pilot.
Also began applying TBII Q&T Fillets.


Pretty Much Done... except for primer and paint.


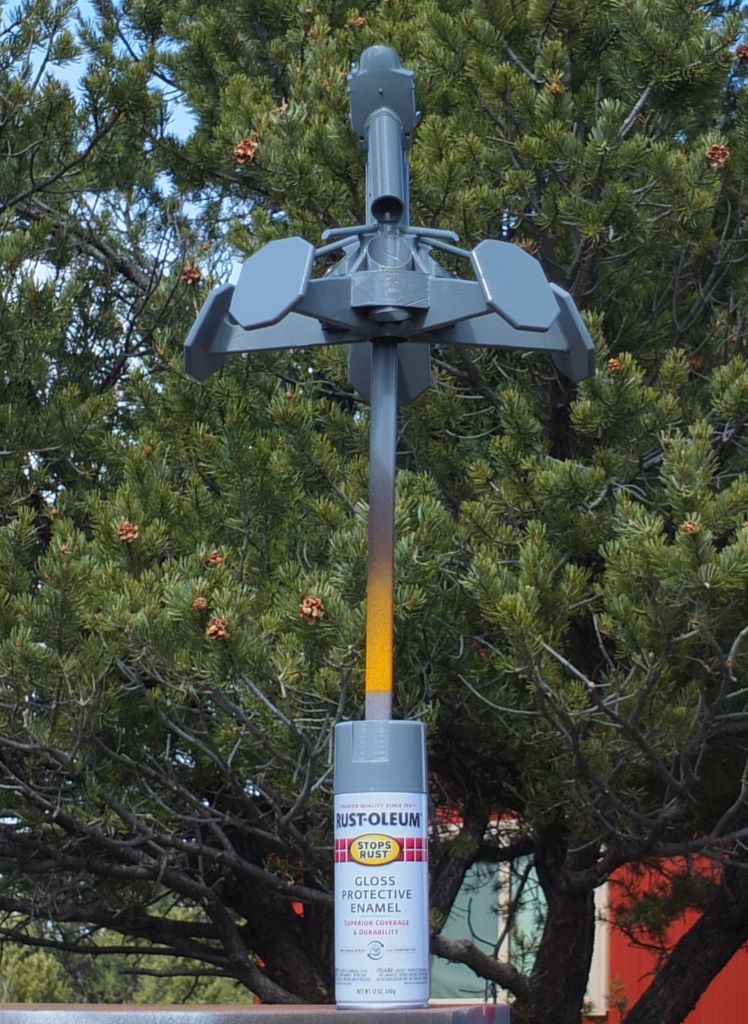
2025-03-03 Rustoleum Red Oxide Primer


2025-03-04 Rustoleum Smoke Gray Paint
... kind of a NASA Lunar Lander Research Vehicle, LLRV, vibe going for Gus's Ride.